Opening a franchise location involves dozens of moving parts, and the construction phase is where most of them converge. Miss a step or get the sequence wrong, and you're looking at delays, budget overruns, and a pushed-back opening date. This checklist covers the 15 critical steps from the day you sign your lease to the day you open your doors - in the exact order they need to happen.
The 15-Step Franchise Fit-Out Checklist
1. Sign Lease and Review Landlord Requirements
Before construction begins, review your lease agreement carefully. Most commercial landlords have specific construction requirements: approved working hours, insurance minimums, contractor pre-approval, and restoration clauses. Your landlord may also provide a "Landlord Work Letter" outlining what base building work they'll complete (demising walls, HVAC drops, electrical panels) versus what falls on your scope. Understanding this division upfront prevents costly surprises later.
2. Engage Franchise Corporate Construction Team
Most franchise brands have a construction or real estate department that must approve your site, review your layout, and sign off on drawings before you can start building. Engage them immediately after lease signing. They'll provide brand standards, approved equipment lists, and design guidelines that your architect and contractor will need from day one.
3. Hire a Franchise-Experienced Contractor
This is the most impactful decision you'll make. A contractor with franchise construction experience already understands brand standards, typical equipment requirements, and the inspection process for food service or retail environments. They can start pricing and scheduling while your drawings are being finalized, saving you weeks on your overall timeline.
4. Submit Architectural and Engineering Drawings
Your architect will prepare construction drawings based on the franchisor's design criteria and the landlord's base building conditions. These drawings need to be stamped by a licensed engineer (structural, mechanical, electrical) before they can be submitted for permits. Coordinate all consultants to submit drawings simultaneously - waiting for one discipline at a time adds weeks to the process.
5. Apply for Building Permits
Submit your building permit application along with all sub-trade permits (plumbing, electrical, mechanical, gas) at the same time. In most Canadian municipalities, this takes 3-8 weeks depending on location and complexity. Pre-consultation with the building department can identify potential issues before formal submission and speed up approval.
6. Schedule Utility Connections
Contact your local gas, hydro, and water utilities to schedule new connections or upgrades. Utility companies often have their own lead times - gas line installations can take 4-6 weeks to schedule, and electrical service upgrades may require transformer work that takes even longer. Start this process as early as possible so it doesn't become a bottleneck during construction.
7. Demolition of Existing Space
If you're taking over a previously occupied unit, demolition of the existing layout is your first physical construction step. This includes removing old partitions, flooring, ceiling tiles, plumbing fixtures, and any equipment left behind. A demolition permit may be required. Your contractor should also perform an asbestos assessment before demolition begins, as required by provincial regulations for buildings of a certain age.
8. Rough-In Mechanical, Electrical, and Plumbing
This is the infrastructure phase. Plumbers run water supply and drain lines to kitchen and washroom locations. Electricians pull wire, install panels, and rough in circuits. HVAC contractors install ductwork, rooftop units, and gas lines. This phase happens while walls are still open, and proper coordination between trades is essential to avoid conflicts and rework.
9. Framing and Drywall
Once rough-ins pass inspection, metal stud framing goes up to define your floor plan - kitchen walls, washrooms, storage rooms, and dining areas. Drywall is hung, taped, and finished. Fire-rated assemblies (1-hour or 2-hour walls) are built to code specifications where required. This step transforms the raw space into recognizable rooms.
10. Install Commercial Kitchen Equipment
For QSR and restaurant franchises, this is one of the most complex and expensive steps. Walk-in coolers and freezers are assembled. Hood systems with Ansul fire suppression are mounted and connected. Cooking equipment, prep tables, and dishwashing stations are set in place and connected to plumbing, gas, and electrical. Equipment should have been ordered 6-10 weeks earlier to arrive on time for this phase.
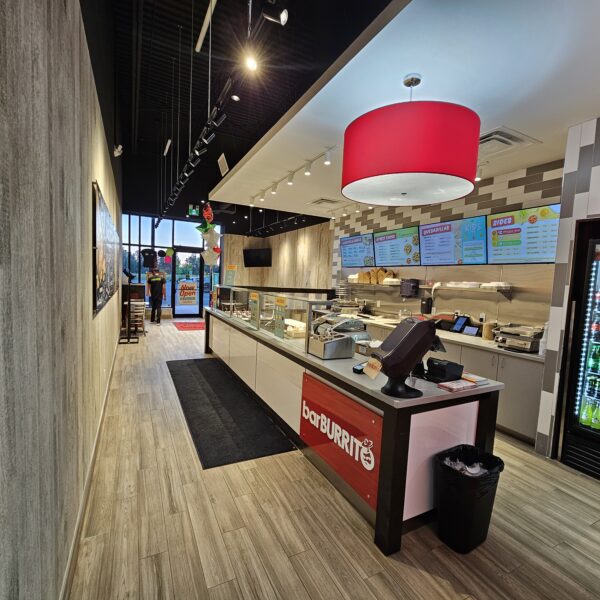
11. Finishes: Flooring, Paint, and Millwork
This phase brings the brand to life visually. Commercial-grade flooring (often a combination of tile in the kitchen and LVP or polished concrete in the dining area) is installed. Walls are painted in brand colours. Custom millwork - counters, service areas, display cases - is installed. Ceiling tiles, light fixtures, and decorative elements go up. Every detail must match the franchisor's brand standards.
12. Signage and Branding Elements
Interior and exterior signage installation happens near the end of construction. This includes illuminated exterior channel letters, window graphics, menu boards, directional signage, and any branded wall murals. Exterior signage typically requires a separate sign permit from the municipality. Coordinate with your landlord, as many commercial plazas have specific sign criteria (size, placement, illumination type).
13. Final Inspections: Building, Fire, and Health
Before you can open, your project must pass multiple final inspections. The building department inspects structural and code compliance. The fire marshal verifies sprinklers, alarms, emergency lighting, and kitchen suppression systems. The health department inspects food preparation areas, hand-washing stations, and sanitation systems. Each inspection must be scheduled and passed before an occupancy permit is issued.
14. Equipment Testing and Staff Training Setup
With inspections passed, all equipment is tested and commissioned. Kitchen equipment is run through full cooking cycles. HVAC systems are balanced. POS systems, security cameras, and music systems are installed and configured. This is also when you set up the physical environment for staff training - tables, chairs, training materials, and initial inventory.
15. Turnkey Handover and Opening Day
Your contractor completes a final walkthrough with you, documenting any minor deficiencies for correction. Keys are handed over. Your staff training period begins in the finished space, and you coordinate your grand opening timeline with the franchisor. A good contractor provides a warranty period (typically 1 year) covering any construction defects that emerge after handover.
Why a Partner-Operated Contractor Makes This Smoother
Each of these 15 steps involves coordination between multiple parties: your franchisor, your landlord, sub-trades, equipment suppliers, municipal inspectors, and utility companies. With a partner-operated contractor like Trivex, a company owner is on your job site every day managing this coordination directly. There are no layers of project managers between you and the person making decisions. That means faster response times, fewer miscommunications, and a construction process that stays on schedule.
How long does a franchise fit-out take from lease to opening?
A typical franchise fit-out takes 8 to 16 weeks from construction start to opening day, depending on the size, complexity, and permit timelines. Including the pre-construction phase (design, permits, procurement), the total timeline from lease signing to opening is usually 12 to 24 weeks. Working with an experienced franchise contractor who manages all 15 steps can significantly reduce this timeline.
What is the most common cause of delays in franchise fit-outs?
The most common cause of delays is late or incomplete permit applications. Many franchise owners wait until their lease is signed to start the permit process, losing 4-8 weeks that could have been spent in parallel. Equipment lead times are the second most common issue - commercial kitchen equipment can take 6-10 weeks to arrive if not ordered early.
Need Help With Your Franchise Fit-Out?
We've completed over 250 franchise fit-outs across Canada. Tell us about your project and we'll give you a realistic timeline and budget.
Get Free Estimate